Have you ever wanted to change your voice while making videos? Or just change the voices in an existing video? You are not alone. Here are some questions people have asked on Yahoo Answer.
Is there any free software you can download that can change your voice in an audio or video that has already been recorded?
Hello, I'm making a video. I want to change my voice pitch high, low, fast, slow. I want to know if you know any software that is easy and simple. Thanks
Now comes the solution. I recommend Wondershare Filmora (originally Wondershare Video Editor), a comprehensive video editing software that's not as expensive as Adobe After Effects, but is also not free ($39.99). We'll show you how to change a recorded voice or original voice in an existing video/audio with Wondershare Filmora (originally Wondershare Video Editor).
Step 1: Add voiceover or add videos
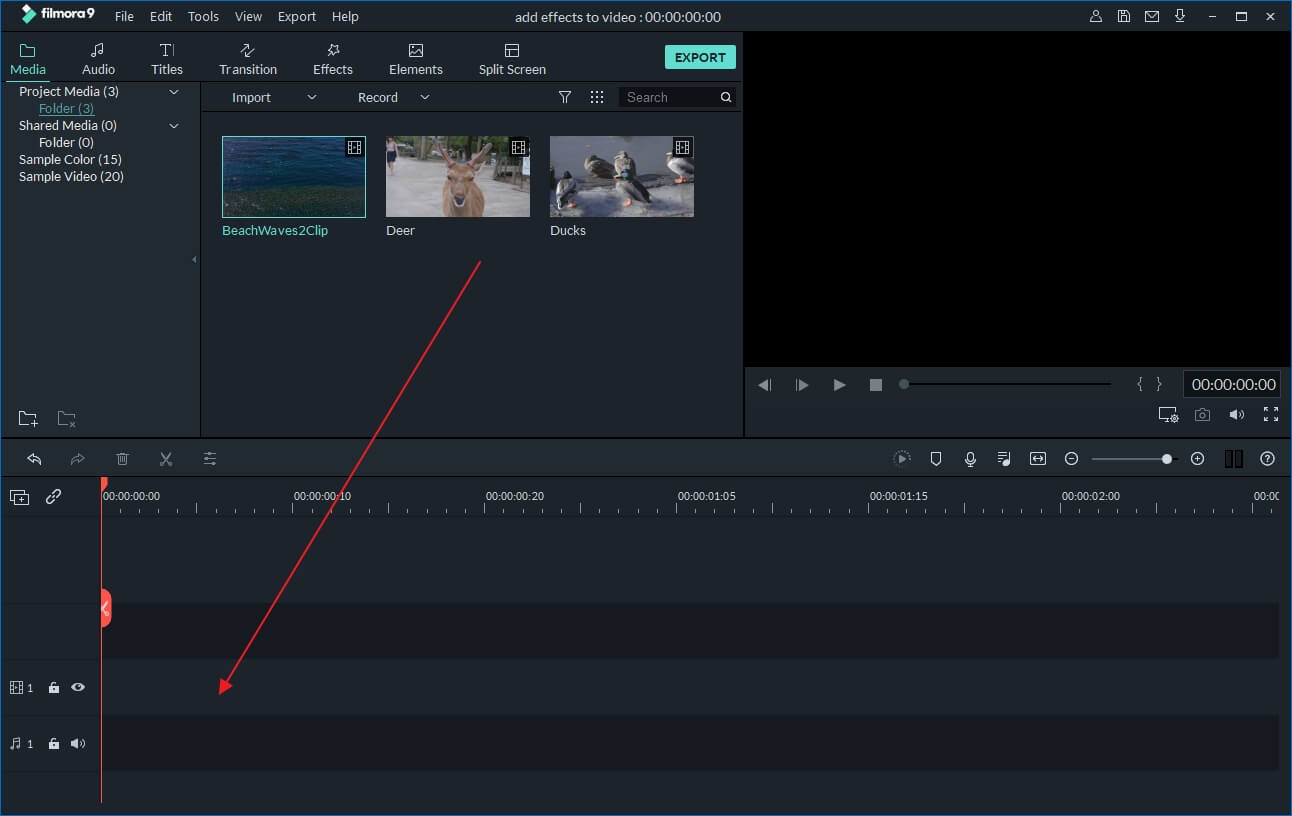
Wondershare Filmora (originally Wondershare Video Editor) allows you to change voice of video/audio and recorded voiceover. You can either click "Import" on the primary windows to import video/audio files to the User's Album, or click the voiceover button above Timeline to record your own voice. The imported video/audio files could then be added to the Timeline for editing, while the recorded audio would automatically appear on Audio track.
Step 2: Change voice with one click
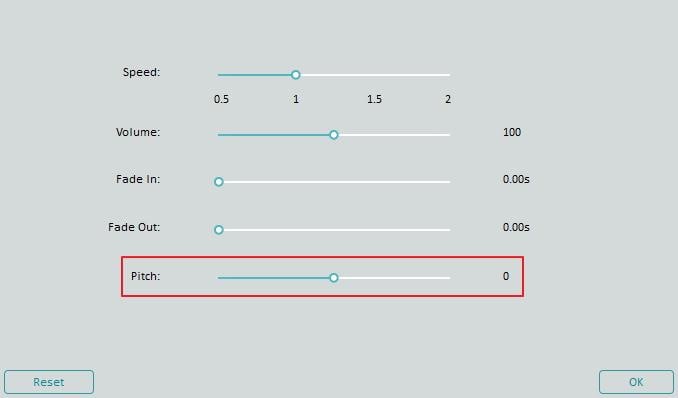
Every time when you double click on the added video/audio or recorded voiceoveron the Timeline, you will open the editing panel. You should see options such as Speed, Volume, Fade in, Fade out and Pitch.
Pitch Option
Both video/audio files and voiceover on the Timeline have the Pitch option. Through it, you could easily change the voice of video or recorded voiceover. Just drag the little triangle button to a desired position. The value will vary from -12 to 12.
Speed Option
As you could see, there are 4 settings for the Speed option. The Video Speed option will take effect on both video and audio track you selected. For music files and voiceover, the Speed option also works but only affect the audio itself.
Step 3: Export changed video/audio
When you are satisfied with the changed voice, it's time to save the video or audio. All popular video formats and MP3 audio formats are supported. To do so, click "Create" and select "Format". From the list, choose a format you want and click "Create" button. The file will be exported to the specified folder on computer.
Tips: Always preview your video/audio on the preview windows to ensure it's what you want before exporting.
First Download the latest version from the below link..
When first launched, with a new, empty BBSettings file, the blog list is empty
To make your life easier, you can just log into Blogger this once and grab your blogs
If you have a second, or more, Blogger ID & associated blogs, you can also add those blogs to your list as well.
OR you can manually enter the Blog Title, Blogger URL and update the Blogger Feed URL.
And then click "Add Blog", to add it to your blog list
Once you click Ok, your blogs will then be available for backup
You can save your current BBSettings file, open another, etc.
Each blog's settings are saved separately, so for each blog you can have different settings.
And of course, when restoring posts you have to log into Blogger.
New v1.0.5.14 New Restore Button
Selecting files, previously backed up posts.
Final confirmation and kicking off of the restore.
New v1.0.4.10
New Custom Path Builder dialog
A number of folder name options
Lots or File naming options...
You can design a folder path and file name that fits you and your style...
How the results/output looks in Windows Explorer
New v1.0.1.6
Previous Version Most of the functions/features/drop downs are the same in v1.0.1.6...
All data Collected from : http://bloggerbackup.codeplex.com/
I will show you how to download WhatsApp on your PC/Laptop using Youwave Android emulator. Simply follow the below steps in minutes you can use WhatsApp in Your PC.
Download Youwave software for free from the above URL.
After completion of your download, install the software and head over below procedure.
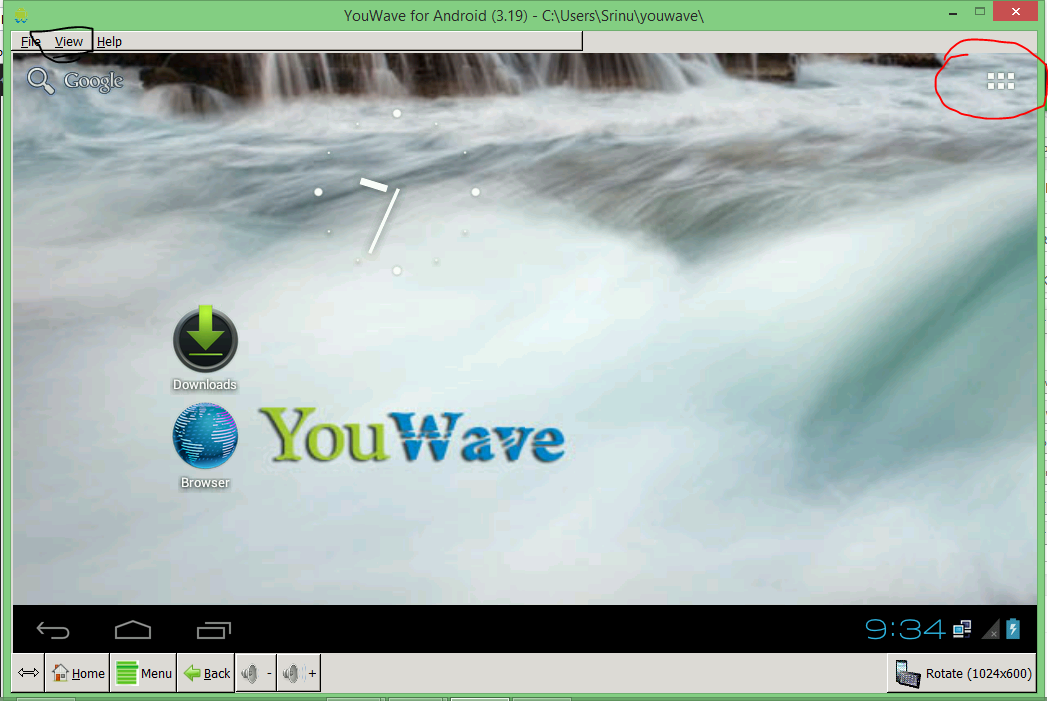
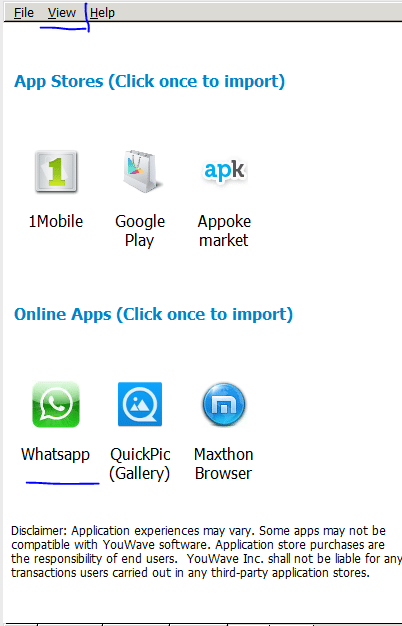
If you successfully install Youwave software open it; then, you will see a screen like below.
Starting screen of Youwave Android Emulator
Click on view button which is located at the left side top. You will see a drop down menu there click on online content.
After clicking on online content you will get options like the below image there as you can expect click on whatsapp. Now you freely download WhatsApp for PC.
Once clicking on whatsapp wait for few seconds after that whatsapp will be installed on your computer.
Activate WhatsApp in Your Windows 7 or Windows 8/8.1 PC
Now, Go to home screen click on right top corner as you can see in first image. That is menu button after pressing that one you will see all installed applications. There you can find whatsapp.
>> Open whatsapp and enter your country code or simply select your country and enter your phone number.
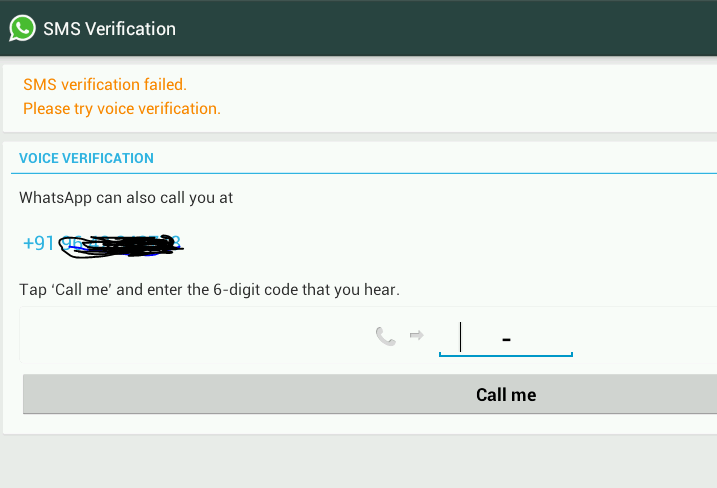
After entering phone wait for 5 minutes for auto verification. After 5 minutes you will get option to get the code via call like in image below. Click on call me and listen the code and enter the verification code there.
Hold on… don’t go away : Check out below paragraph to know “how to add contacts in WhatsApp for PC“.
Watch Movies in your android phone with this app called Showbox.
Adding Contacts in WhatsApp For PC (Updated on Nov 8th-2014)
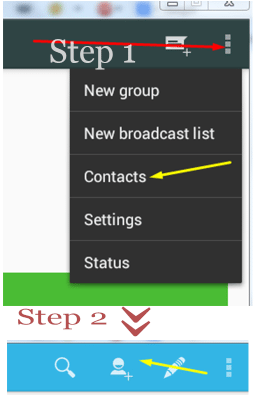
Many people who are successfully installed WhatsApp, they are asking me that how can I add contacts in WhatsApp. So here is the simple way to add new contacts and friends in your WhatsApp (in Windows laptop or PC). First of all open your WhatsApp in YouWave Software. Later Click on the Menu icon(horizontal line in top right side). Now follow the images.
Follow as it is in Image
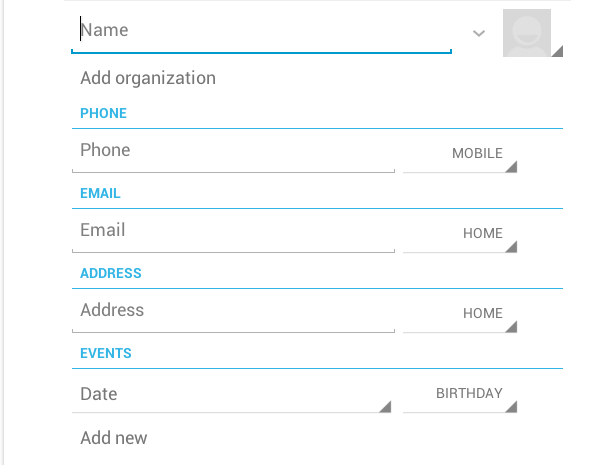
Enter details and click on done.
That’s it friends. Now you can see your newly added friend in contacts list.
This is the easiest way to download whatsapp for PC free. I hope you like simple tutorial. If you want to install whatsapp on windows mobile you can download whatsapp for windows phone here. That’s it friends. I hope you like this easy tutorial. If you liked it share it on Facebook or twitter or Google+.